|
Never Forget |
||||||||||||
|
|
||||||||||||
EngineInteriorExteriorOld Items1C3EL75R62N324237Car InformationThe Society of Automotive Engineers Car EnthusiastsCar Parts Vendors |
2002 Chrysler Sebring Convertible GTC
|
|||||||||||
 |
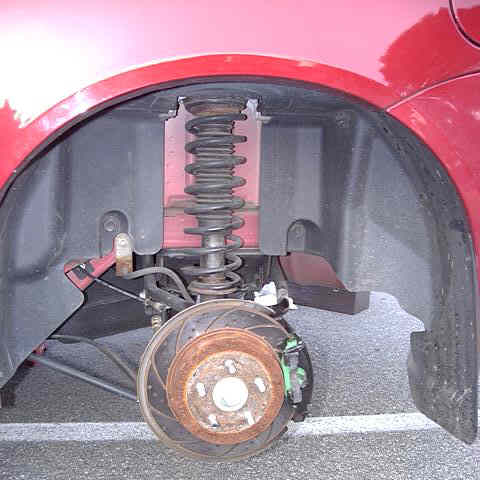
| Left Rear Disc Brake Assembly, Showing EBC Rotor and Greenstuff Pad |
Notice also that the caliper in the above picture was painted black. I painted my calipers and stanchions black, mainly as a material longevity issue. I chose black, since the high-temperature red paint being offered did not match my car's red paint.
Of note is the the front calipers were held on with 10 mm Allen head bolts, not normal hex-headed bolts. This is certainly different from any other car I have worked on, and was not discussed in the FSM. So keep this in mind if you go to do your own brakes.
Dodge Stratus R/T Sedan Struts and Springs
In order to make my car handle more responsively, I changed out the struts and springs to use those from a Dodge Stratus R/T Sedan. Remarkably, as far as removal and installation went, the R/T suspension was identical to my car's suspension. It turns out that the JR series cars can interchange their suspension parts, so even a base Dodge Stratus sedan can use the suspension parts off a Stratus R/T sedan. Indeed, the only real difference between a Sebring Convertible suspension and a sedan suspension is that the Sebring Convertible uses a different rear polyurethane jounce bumper for the rear struts. Apart from that, it's the same as for a sedan.
Now, I wanted response, and I was also curious about lowering my car a little. The R/T suspension lowered my car by about 1/2 an inch, which is barely perceptible. It would appear that the R/T rear springs were not really meant to carry the extra weight of a Sebring Convertible, since the rear tends to sag a little whenever I have cargo in the trunk and/or rear passengers.
The car handles quite a bit better than before, though. I noticed a marked decrease in the amount of sway when turning corners, and the overall ride is somewhat harsher than before. I am curious to find out what would happen if I were to install a stiffer rear swaybar, but I am understandably hesitant to do so, given the experience with the Dreamspeed swaybar breaking my rear swaybar mounts on my old Limited.
HID Headlamp Conversion
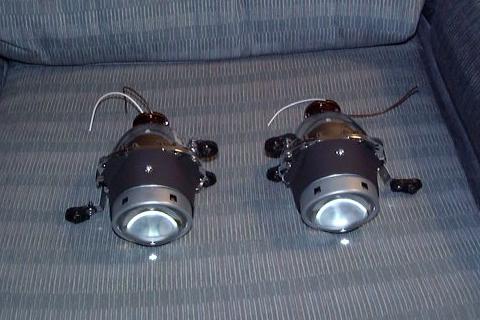
I converted my headlamps to use HID projectors from an Audi A4. The Hella Bi-Xenon projectors, as they are known, were purchased as a "kit" from HID Tech. What was somewhat disappointing was that this "kit" only consisted of the projectors themselves, the ballasts, and the bulbs. I basically had to fabricate projector housings (so as to not blind oncoming traffic) and the wiring harness. Now, I understand that different cars can have differing amounts of usable space for the projectors, and that might be the reason for not including projector covers, but wiring is pretty standard on cars. As it turns out, my car's wiring supports type 9007 headlamp bulbs, and it would not be that much effort to include a harness that had type 9007 wiring connectors.
 |
| Left-Hand and Right-Hand HID Projectors |
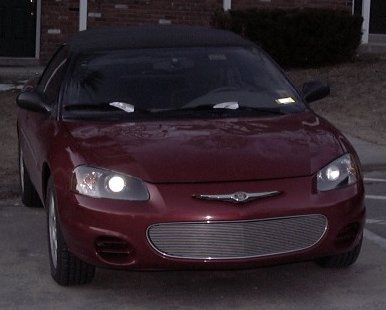
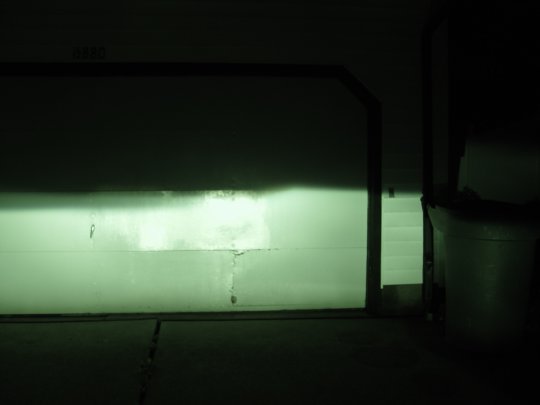
In any case, the headlamps are now installed, and they are much better than stock lamps. There are no concerns about blinding oncoming traffic. The projectors themselves are almost fully free to be aimed either left or right, or up or down, by the aiming mechanisms. They projectors are blocked from aiming fully up by the bottom of the headlamp sockets. The beams fan out from the projectors downwards, but end abruptly right where the projectors themselves are mounted. The beams are angled slightly downwards, so that they're about 4 inches lower than when they leave the projectors, when the car is 25 feet away from a wall. Visibility is much improved over stock.
 |
| Both HID Headlamp Assemblies Installed |
When the high-beams are engaged, road signs are lit up brilliantly, from as far as one mile away. Of course, the high beams tend to blind oncoming traffic, too. This actually works out to be a good thing, since I can now signal oncoming drivers to turn off their high beams. This simply was not possible with the stock headlamps.
The HID headlamps are wired in such a way so that the ballasts get their power from a relay that is connected directly to the battery. Each ballast is protected by a 20 A fuse. The relay is wire-OR'ed to the stock headlamp wiring via a pair of diodes. The diodes, connected to the low- and high-beam circuits, allow the circuits to close the relay while preventing either circuit from backfeeding to the other circuit. In addition, the high-beam circuit is connected to the projector high-beam solenoids, so as to operate the projector high-beam function. All of this wiring is interfaced via type 9007 headlamp bulb sockets, and spade connectors. Therefore, if the need arises, the stock headlamps could simply be plugged in without having to cut any wiring.
 |
| HID Headlamp Beam Pattern |
The beams tend to jiggle slightly if the car goes over a section of moderately rough road, such as over railroad tracks. This is somewhat concerning, in that the jiggle could become worse as the aiming mechanisms wear out over time due to this jiggling. I am considering using some sort of RTV to tighten up the aiming mechanism balljoints that attach the projectors to the mechanisms.
You can see more pictures of the HID headlamp conversion here.
Other trademarks and logos are copyrighted by their various owners.
This website copyright © 2000-2015 Thomas A. Vago. All Rights Reserved.