JR Body (2G Cloud)
CMTC Installation
CMTC Calibration
JA/JX Body (1G Cloud)
CMTC Installation
CMTC Calibration
Swaybar Installation
Cat-Back Exhaust
Induction Tube
MSD 6AL Installation
TPS Modification
Miscellaneous
Waste Money
Car Information
AllData
AllPar
The Society of Automotive Engineers
Car Enthusiasts
2GSS.net
Dakota-Durango
Stratusphere
2GN.Org
Neons.Org
LXForums
Custom Magnums
SebringClub.net
Car Parts Vendors
Car-Part.Com
Mopar Dealer Parts
|
|
How To Change Your Rear Sway Bar
JA/JX (1G Cloud)
This How-To describes the removal and installation of the rear sway bar on the Chrysler Cirrus/Chrysler Sebring Convertible/Dodge Stratus/Plymouth Breeze. Specifically, this How-To should be used to replace the stock sway bar with a stiffer one, such as the sway bar offered by Dreamspeed Performance Engineering. The procedures described with this How-To should take a reasonably competent mechanic about 1 hour, and no more than 1.5 hours, to perform both removal and installation.
| Warning |
|---|
| The instruction presented herein is to be used at your own risk. While checked for accuracy, the information in this page may not be 100% accurate, and may not work for your particular vehicle. I will not assume liability for any damages or injuries that result from either properly or improperly following this instruction. Failure to abide by this instruction while performing the indicated task may result in costly damage and/or injury. |
| Note |
|---|
This instruction only applies to the below models:
| Automobile | Model Year | 2.0L
I-4 | 2.4L
I-4 | 2.5L
V-6 |
| Sebring Convertible | 1996-2000 | N/A | Yes | Yes |
| Cirrus | 1995-2000 | Yes | Yes | Yes |
| Stratus | 1995-2000 | Yes | Yes | Yes |
| Breeze | 1996-2000 | Yes | Yes | N/A |
|
Removal
- Loosen the rear wheel lug nuts.
- Raise the rear end and place on jackstands.
- Block both front wheels.
- Remove the rear wheels.
- Remove the nuts attaching the sway bar links and sway bar isolator bushings, then remove the isolator bushings.
- Unbolt the sway bar clamps from the rear crossmember.
- Remove the sway bar from the vehicle.
Installation
- Position the sway bar where it will be installed in the vehicle. Refer to the below picture to properly orient the sway bar.
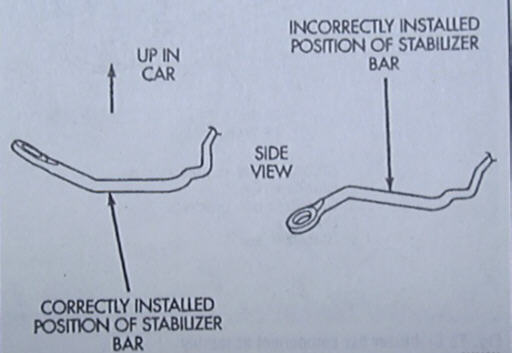 |
| Correct Sway Bar Orientation
|
| Note |
|---|
| The use of a jack, as well as various prying tools, may be required to get the sway bar installed. |
| Warning |
|---|
| Take special care when using a jack to move the suspension components on the vehicle to align with the sway bar. The danger exists that the vehicle could move off the jackstands, causing injury and/or death. |
- Install the isolator bushings and nuts.
- Install the sway bar clamps to the rear crossmember, making sure that the bushings are installed so that the slit in the bushings face the front of the vehicle.
- Tighten the isolator bushing nuts to 24 ft-lbf.
- Tighten the sway bar bolts to 20 ft-lbf.
- Install the rear wheels and lug nuts.
- Lower the vehicle.
- Unblock both front wheels.
- Tighten all of the lug nuts to 55 ft-lbf, following the below pattern. Repeat for 85 ft-lbf, then for 97 ft-lbf.
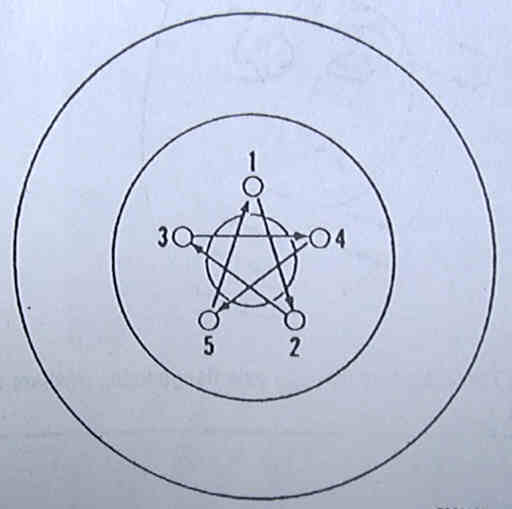 |
| Wheel Lug Nut Tightening Pattern
|
Pictures
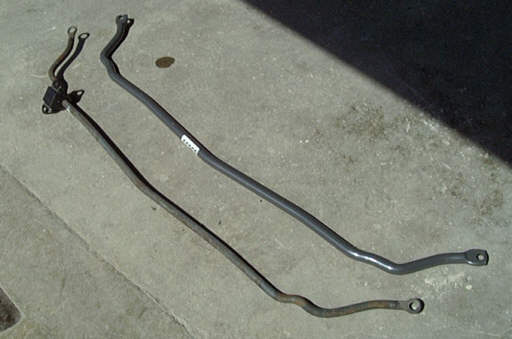
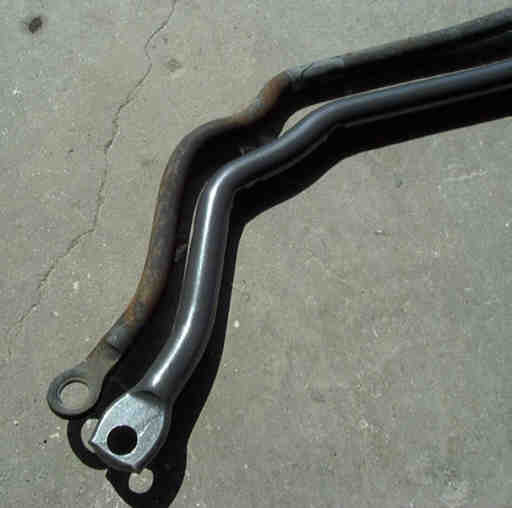
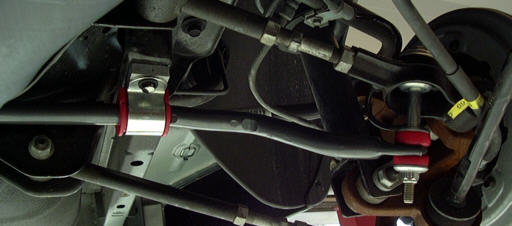
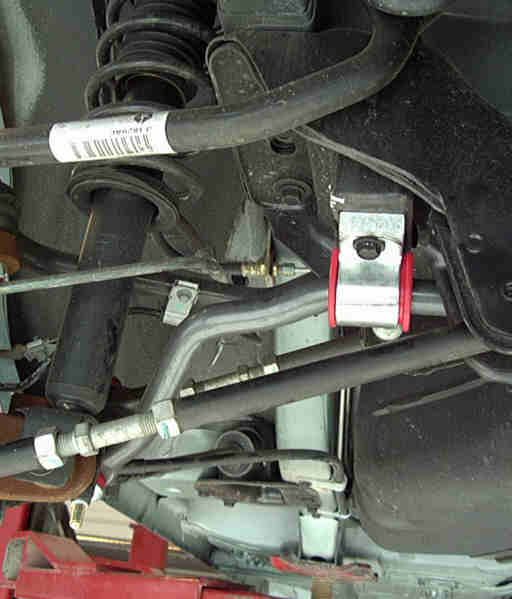
Here are some pictures I took while removing and replacing the stock sway bar with the Dreamspeed replacement. After I installed it, the test-drive revealed a wonderous improvement in handling! My car now handles about like it's on rails. This is a really big difference from what the car performed like with the stock sway bar.
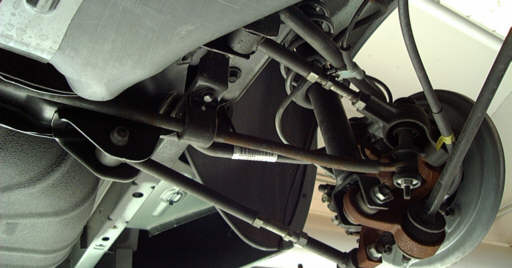 |
| Port View Facing Aft of Stock Sway Bar
|
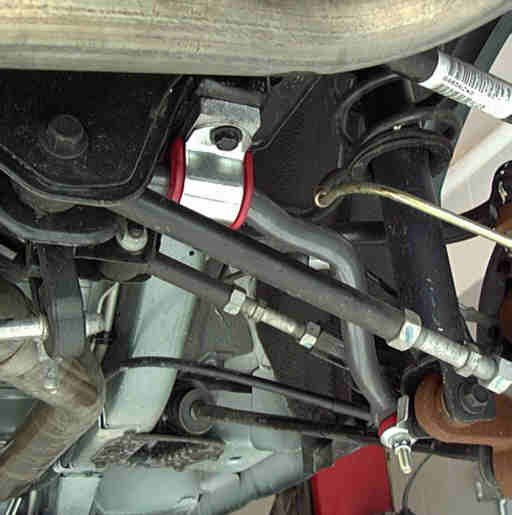 |
| Starboard View Facing Forward of Dreamspeed Sway Bar
|
|


